
Best Vacuums and Extractors for Cars
Browse All Vacuums & Extractors
Click through to check today's price and availability from trusted retailers.
- All brands
- Akitas
- Bissell
- botatio
- Deuknice
- Dyson
- Filigo
- Gtech
- Jack's Classic
- Nvkhg
- Relidol
- Ryobi
- Shark
- Vax
- Vytronix
- Worx
- Rating: High to Low
- Rating: Low to High
- Title: A → Z
- Title: Z → A
Vacuums & Extractors
Clean Interior. Zero Compromise.
Surface wiping moves dirt around. Vacuums and extractors remove it entirely. The right machine pulls dry debris from carpet fibres, wet spills from seat fabric, and embedded grime from mats and sills that no cloth can reach. Knowing which machine suits which type of contamination is what separates a fresh interior from one that simply looks clean on the surface.
4
Machine types
Dry
and wet
Deep
Extraction
Fabric
and carpet
How It Works
Why Vacuums and Extractors Remove Dirt That Cloths Cannot
The difference between removing contamination and redistributing it
A vacuum creates negative pressure that draws loose particles upward from carpet fibres, seat fabric, and hard surfaces into a collection chamber. Standard dry vacuums handle grit, dust, crumbs, and pet hair effectively. The key variable is suction power relative to attachment design, so a narrow crevice tool concentrates airflow to dislodge debris from stitching and seat folds, while a wide brush head covers flat surfaces quickly without scattering the debris first.
Extractors work differently. They inject a solution of water and cleaning product into fabric or carpet, agitate the fibres to break loose bonded contamination, then immediately suck the dirty liquid back out. The result is contamination removal at fibre level rather than surface level, the kind that eliminates the stale smell that persists after a surface wipe and prevents mould growth from moisture sitting inside the fabric padding.
Most car interiors need both approaches applied in sequence. Dry vacuuming first removes loose particles so they do not turn into mud during the wet extraction stage. Extraction then pulls bonded contamination from fabric that dry suction alone cannot reach. Done in the wrong order, applying wet cleaning solution over dry debris, you push grit deeper into the fabric and create a sludge layer at fibre base that is harder to remove than either problem was separately.
Is and Isn't
What Vacuums and Extractors Do (and Don't Do)
These tools remove contamination from fabric and carpet, they do not replace a fabric cleaner
A vacuum or extractor IS...
- Remove dry debris, grit, dust, and pet hair from carpet, seats, and hard-to-reach crevices
- Extract bonded contamination from fabric and carpet fibres using water and cleaning solution
- Eliminate odour sources by removing the organic material causing them rather than masking the smell
- Prevent mould growth by extracting moisture after wet spills or overwetting during cleaning
- Reduce drying time compared to leaving saturated fabric to air dry unaided
A vacuum or extractor ISN'T...
- A replacement for fabric or carpet cleaner solution, the machine applies and extracts, the chemistry does the cleaning
- Capable of removing paint, dye, or chemical stains from fabric, these require specialist treatments
- A one-pass fix for severely neglected interiors, heavily soiled fabric needs repeat extraction passes
- Suitable for leather seats without the correct attachment, hard nozzles can scuff and mark leather surfaces
- Effective on odour without addressing the source, vacuuming over a pet accident does not remove the uric acid causing the smell
Machine Types
Four Types of Vacuum and Extractor
Matched to the contamination type, fabric involved, and how often you clean
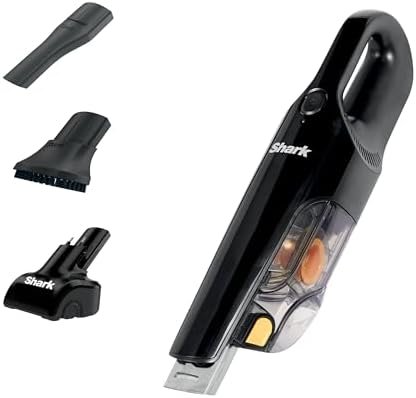
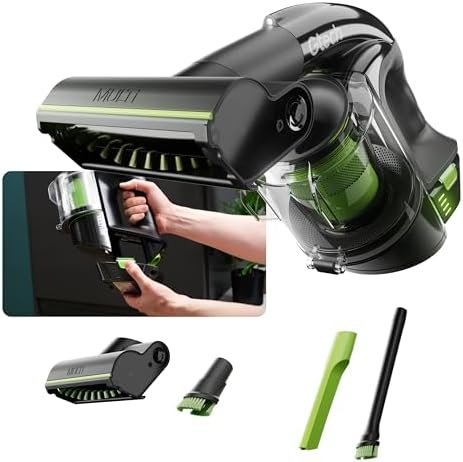
Type 01
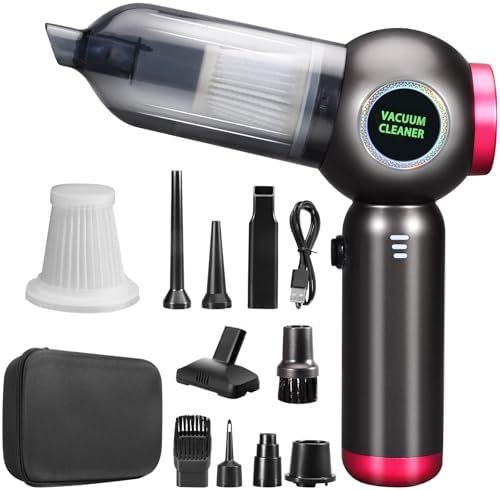
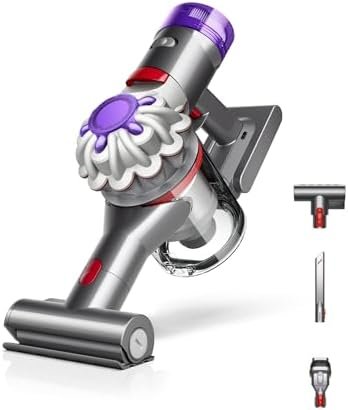
Cordless Handheld Vacuums
Quick-access dry vacuuming for regular maintenance between full detail sessions
Most popular
- Cordless design means no cable to run through the car or restrict movement between seats
- Lightweight and fast to deploy for removing crumbs, grit, and loose debris after everyday use
- Crevice and brush attachments handle seat gaps, floor mats, and dashboard air vents
- Adequate suction for regular maintenance but not designed for deep embedded carpet contamination
Cordless handhelds work best as a between-session maintenance tool rather than a replacement for a full detail vacuum. Battery runtime limits how long you can run at maximum suction before output drops.
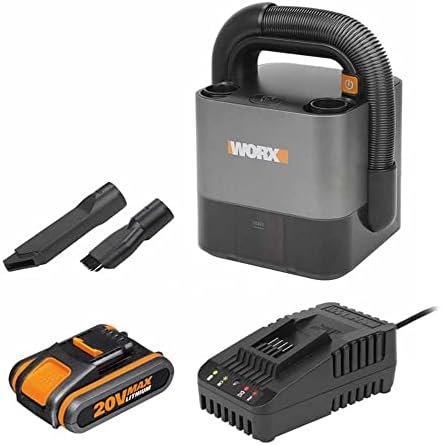
Type 02
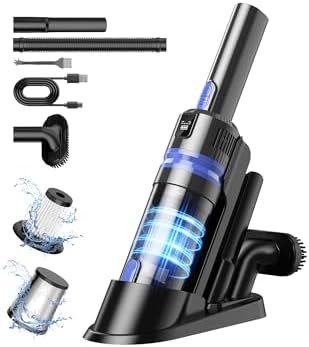
Wet and Dry Vacuums
Handle both dry debris and liquid spills from a single machine with a large capacity tank
Best versatility
- Switch between dry debris collection and wet liquid pickup using the same machine
- Higher suction power than handheld units for pulling embedded grit from carpet pile
- Large tank capacity suits multi-seat cleaning without stopping to empty between areas
- Can draw standing liquid from a spill before it penetrates through to the seat foam below
Wet dry vacuums do not inject cleaning solution, they pick up what is already on the surface. For deep fabric cleaning you still need an extractor. These sit between the handheld and the full extractor in capability and cost.
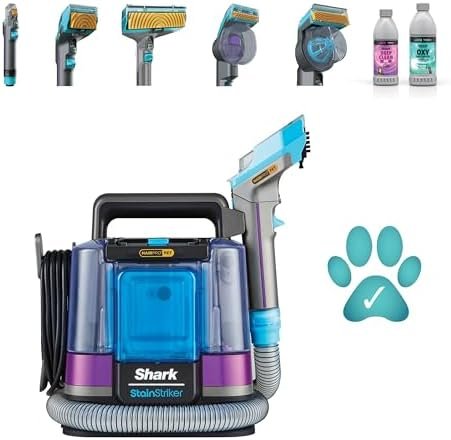
Type 03
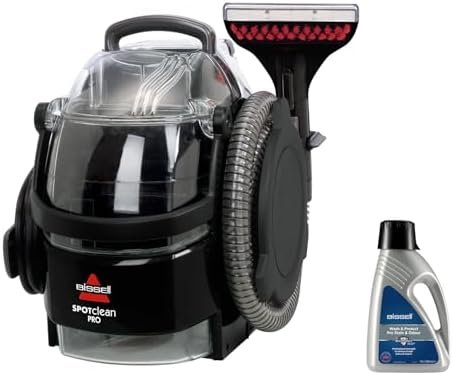
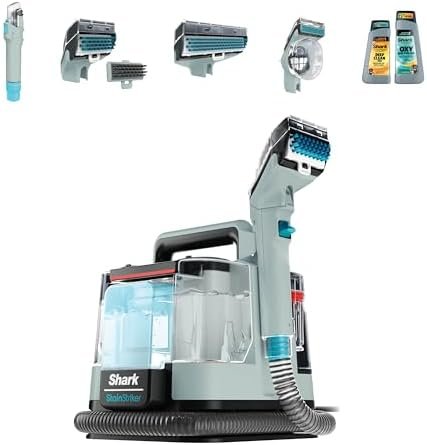
Carpet and Fabric Extractors
Inject solution, agitate fabric, then extract dirty liquid in a single powered pass
Best for deep cleaning
- Powered brush head agitates carpet and seat fabric to break loose bonded contamination before extraction
- Clean water tank and dirty water tank separate so you always apply fresh solution
- Removes the source of persistent interior odour rather than covering it with fragrance
- Reduces drying time versus hand-applied fabric cleaner and towel blotting
Extractors work best when the fabric is pre-vacuumed first and the cleaning solution has had time to dwell before the extraction pass. Rushing the process and skipping pre-vacuum produces noticeably worse results.
Type 04
Professional Detailing Vacuums
High-suction, continuous-use machines built for multi-vehicle professional environments
Best for high volume
- Sustained high suction across long sessions without the performance drop of consumer machines
- HEPA filtration on many models captures fine dust particles rather than recirculating them into the air
- Wide attachment sets cover every interior surface type from headliner fabric to hard plastic trim
- Built for frequent emptying and filter cleaning cycles across multiple vehicles per day
The suction rating on professional vacuums is only one part of the performance picture. The filter quality and how often it is cleaned have as much effect on real-world suction as the rated motor power.
Dirt Type Matching Guide
Match the Machine to the Contamination
The same machine is not the right answer for every type of interior contamination
Dry Debris
Grit, Crumbs, Dust, Sand
Loose particles in carpet, seat folds, and floor mats
The most common type of car interior contamination. Brought in on footwear, through open windows, and from pet movement. Fine particles settle deep into carpet pile and seat fabric where they act as an abrasive against the fibres over time.
Best tool
Cordless handheld for regular maintenance passes. High-suction shop or detailing vacuum for full session cleaning with crevice attachment.
Technique
Work carpet against the pile direction first to stand fibres upright, then vacuum with the pile. This dislodges embedded particles that a single-direction pass misses.
Wet Spills
Drinks, Rain Ingress, Pet Accidents
Liquid contamination in seat fabric, carpet, and boot lining
Speed matters with wet spills. Liquid penetrates through fabric quickly and reaches the foam padding beneath, where it sits in a damp environment and encourages mould growth and persistent odour. The sooner moisture is extracted, the less damage occurs at depth.
Best tool
Wet dry vacuum to draw the liquid out immediately. Follow with an extractor pass using an enzyme-based cleaner for organic spills like food, drink, or pet accidents.
Technique
Do not blot or press down on the spill before vacuuming, pressing drives liquid deeper into the padding. Apply suction directly over the spill first to draw it upward.
Embedded Grime
Ground-In Soil, Mud Residue, Food Staining
Bonded contamination at fibre level in carpet and fabric
Contamination that has been walked in, sat on, and compressed into carpet fibres over time. Dry vacuuming removes the loose top layer but leaves bonded material at fibre base. This is what causes a carpet to look grey even after vacuuming, and what generates persistent stale odour in neglected interiors.
Best tool
Fabric or carpet extractor with a fabric-specific cleaning solution. Pre-vacuum to remove loose particles first, then apply solution and allow dwell time before the extraction pass.
Technique
Multiple slow extraction passes outperform a single fast one. Slow movement gives the machine time to draw contaminated liquid fully upward rather than pushing it to the sides of the brush head.
Pet Hair and Odour
Animal Hair, Dander, Urine and Biological Deposits
Fibres tangled in carpet and seat fabric, organic odour sources
Pet hair wraps around carpet fibres and resists suction unless it is physically loosened first. Standard vacuum nozzles pass over rather than through it. Biological deposits including urine and vomit leave odour compounds bonded at fibre level that masking sprays cannot neutralise, they require enzyme treatment and full extraction to remove.
Best tool
Rubber bristle attachment or pet-specific brush head to loosen hair before vacuuming. Extractor with enzyme cleaner for biological odour sources.
Technique
Rub a slightly damp rubber glove across seat fabric to ball up pet hair before vacuuming. The static and texture lifts hair that suction alone cannot engage. Then vacuum and follow with extraction where odour is present.
The sequence matters: always dry vacuum before any wet or extraction step. Applying cleaning solution over loose debris turns it to mud at fibre base and makes the problem harder to resolve. Pre-vacuum, apply solution, allow dwell, then extract. For pet odour specifically, enzyme cleaners need adequate dwell time, a minimum of five minutes on the fabric before the extraction pass, to break down the uric acid compounds that cause the smell.
Choosing the Right Machine
How to Choose a Vacuum or Extractor
Four questions that narrow down the right machine for how you clean
Consider 01
Is the Contamination Dry, Wet, or Embedded?
Dry loose debris needs suction power and the right attachment. Wet spills need wet dry vacuum capability. Embedded grime and fabric staining needs an extractor with a cleaning solution. Most car owners need at least a good cordless vacuum plus the option of extraction when the interior needs a deeper clean.
Consider 02
How Often Will You Use It?
Weekly maintenance between full details favours a quick-deploying cordless handheld. Monthly full interior cleans call for a more powerful corded unit with a full attachment set. Occasional deep cleans where an extractor is genuinely needed may be better served by hiring one or using a detailing service rather than buying a machine used twice a year.
Consider 03
Do You Have Pets or Children?
Pet hair and biological contamination from children and animals significantly raise the case for an extractor over a vacuum alone. Suction removes surface debris, but the organic compounds causing persistent smell and staining in fabric seats and carpet need enzyme treatment and wet extraction to fully resolve.
Consider 04
What Attachments Does It Come With?
A vacuum is only as useful as its attachments in a car interior. A crevice tool for seat gaps and A-pillar trim, a soft brush head for dashboard and hard plastics, and a wide floor nozzle for carpet cover the majority of surfaces. Check what comes in the box before comparing on suction rating alone.
The Minimum Useful Setup for Most Car Owners
A quality cordless handheld vacuum with a crevice and brush attachment handles regular maintenance reliably. For anyone with fabric seats, carpet mats, or pets, adding a hired or owned extractor for twice-yearly deep cleans transforms interior condition in a way that vacuuming and surface wiping alone cannot match. If extraction is part of your regular routine, a mid-range dedicated car extractor pays for itself quickly versus repeated professional detail costs.
Common Mistakes
Vacuum and Extractor Mistakes That Affect Results
Most problems come from the wrong sequence, the wrong tool for the contamination type, or skipping the drying step
Mistake 01
Applying Cleaning Solution Before Dry Vacuuming
Spraying fabric cleaner or extraction solution onto a carpet that has not been dry vacuumed first suspends loose grit and debris in the liquid and pushes it deeper into the pile. The extractor then draws up a slurry that leaves residue at fibre base. Always remove dry contamination first before any wet step.
Mistake 02
Over-Saturating Fabric During Extraction
Too much cleaning solution applied to seat fabric or carpet does not clean more effectively, it creates longer drying times, a higher risk of mould growth in the padding below, and a tacky residue in the fibres after drying. Use the solution sparingly, allow dwell time, and extract thoroughly. Multiple light passes clean better than one heavy saturation.
Mistake 03
Not Drying the Interior After Extraction
Leaving damp carpet and seat fabric in a closed car creates exactly the conditions mould needs. After extraction, leave windows cracked open and run a fan or dehumidifier if possible. In warm conditions, parking in direct sunlight with windows open for an hour accelerates drying significantly. Never close the car up damp.
Mistake 04
Skipping Pre-Treatment on Stains and Odour
Running an extractor over a food stain or pet accident without applying a targeted pre-treatment first produces weak results. Extraction moves contamination but does not break it down chemically. An enzyme cleaner or fabric-specific stain treatment applied and allowed to dwell before extraction does the breaking-down work that the machine then completes by removing.
The mistake that keeps interiors smelling stale: masking instead of removing
Odour eliminators and air fresheners applied without prior extraction are covering the source, not removing it. The uric acid in a pet accident, the mould spores in damp carpet padding, and the bacterial growth in spilled organic material continue producing odour compounds whether or not a fragrance is sitting on top. The smell returns within days. Extraction removes the source. The odour eliminator then neutralises trace compounds that extraction cannot reach on its own.
After Vacuuming and Extraction
What Comes Next After a Deep Interior Clean
The steps that protect your work and extend the time before the next deep clean is needed
01
Dry Thoroughly Before Closing Up
Open the car and allow air circulation to dry fabric and carpet completely before closing windows and doors. Closing a damp car traps moisture in the cabin and immediately begins creating the mould and odour conditions you just cleaned away. In cooler weather, a portable fan or dehumidifier placed inside the footwell speeds drying considerably.
02
Apply a Fabric Protector to Seats and Carpet
Clean, dry fabric is the right time to apply a fabric or carpet protector. Protector coatings reduce liquid penetration and prevent contamination bonding to fibres, which makes the next clean significantly easier. Apply evenly to dry fabric, allow full cure time before use, and reapply after every deep extraction session.
03
Clean and Maintain the Machine
Empty the collection tank or dirty water reservoir, rinse the tank, and leave all components to dry before storage. A damp collection chamber in a closed machine grows mould between sessions and transfers the smell to the next car it is used on. Clean the filter on a schedule, a clogged filter reduces suction more than any other single factor.
FAQs
What do car detailers use to vacuum?
Professional detailers typically use corded workshop vacuums with strong, sustained suction and a range of attachments. These handle everything from loose dirt to embedded debris without losing power mid-job. Crevice tools for tight gaps, brush heads for upholstery, and wide nozzles for carpets are standard. From our experience, the attachment selection matters as much as suction strength, a vacuum without the right nozzles struggles in cars regardless of power. Some detailers use cordless vacuums for quick top-ups or mobile work, but these usually lack the run time and suction needed for deep cleaning. The general consensus is that corded models with 1200 watts or more provide the performance needed for professional-level results. Most serious detailers keep both, a corded unit for thorough work and a cordless for convenience between proper sessions.
How do I choose a car vacuum?
Prioritise suction power, run time if cordless, and the quality of included attachments. Look for models with at least 100 air watts of suction or 1000+ watts if corded. Attachments should include a crevice tool, upholstery brush, and a wider nozzle for carpets. We’ve found that vacuums sold specifically for car use often have better-designed attachments than general household models adapted for automotive work. Cordless models suit light, frequent cleaning but struggle with heavy dirt or long sessions. Corded vacuums provide consistent power but need access to mains electricity. If you’re only dealing with regular maintenance, a quality cordless unit is enough. For deep cleans, neglected interiors, or professional work, invest in a corded workshop vacuum. The real test is whether the vacuum maintains suction when the bag or canister starts filling up, cheap models lose power quickly.
Do you need a carpet extractor for car detailing?
For deep cleaning, yes. Vacuums remove loose dirt, but extractors lift embedded contamination, stains, and odours that dry vacuuming can’t touch. If you’re working on neglected interiors, dealing with spills, or maintaining cars professionally, an extractor makes a noticeable difference. We regularly see people attempt deep cleans with just a vacuum and spray products, only to find the results don’t last because the dirt is still embedded in the fibres. If you’re only doing regular maintenance on relatively clean cars, a vacuum is usually enough. Extractors are bulkier, more expensive, and require more setup time, which makes them unnecessary for light cleaning. Most people start with a vacuum and add an extractor later when they encounter interiors that need more than surface cleaning. It’s not essential for everyone, but once you’ve used one on a filthy carpet, the difference is obvious.
What is the difference between a carpet cleaner and an extractor?
The terms are often used interchangeably, but extractors specifically refer to machines that inject cleaning solution and immediately vacuum it back out along with dirt and moisture. Carpet cleaners can include simpler machines that apply solution but don’t extract as effectively. True extractors have separate tanks for clean solution and dirty water, and they remove as much liquid as possible in the same pass. From our experience, this dual-action is what makes extraction effective and prevents over-wetting. Some carpet cleaners marketed for home use apply too much solution and don’t extract enough moisture, leaving carpets damp for days. That’s particularly problematic in cars where ventilation is limited and dampness causes mould and smells. When choosing a machine for automotive work, look for one with good extraction power and solution control. The ability to remove moisture matters more than how much cleaning solution it can apply.
How to clean a filthy car carpet?
Start by vacuuming thoroughly to remove all loose dirt and debris. Skipping this step clogs extraction nozzles and reduces effectiveness. Pre-treat heavy stains with a carpet cleaner or dedicated spot treatment and let it sit for a few minutes to break down the contamination. Then use an extractor to deep clean, working in overlapping passes and making multiple dry passes to remove as much moisture as possible. From our experience, filthy carpets need two or three cleaning cycles to come properly clean. Drying is critical. Leave doors and windows open, use fans if possible, and avoid driving the car until the carpets are dry to the touch. Damp carpets pressed underfoot just push moisture deeper into the padding, causing smells and extending drying time. We regularly see people clean carpets properly but ruin the results by not drying thoroughly. If the carpet still smells after cleaning and drying, the problem is usually moisture left behind, not dirt.
What do auto detailers spray on carpet before vacuuming?
Some detailers use a light mist of carpet cleaner or all-purpose cleaner diluted with water. This helps loosen embedded dirt and makes vacuuming more effective, especially on high-traffic areas. Others use nothing and rely on dry vacuuming alone for regular maintenance. From our experience, pre-spraying works well on moderately dirty carpets but isn't necessary for light cleaning or recent spills. For heavily soiled carpets, dry vacuuming first is more effective than spraying. Adding moisture to heavily embedded dirt just creates mud that's harder to remove. The general consensus is that pre-spraying is useful for medium contamination but doesn't replace proper extraction when carpets are genuinely filthy. Save the spray products for regular maintenance, and use an extractor when carpets need serious attention.
Should I vacuum or wipe first in my car?
Always vacuum first. Wiping before vacuuming just spreads dust and loose dirt around, and you'll end up wiping the same surfaces twice. Start with vacuuming seats, carpets, and any fabric surfaces to remove loose contamination. Then move to hard surfaces like the dashboard, door cards, and centre console with spray cleaner and microfibre cloths. We've found this sequence prevents you from redistributing dirt onto freshly cleaned areas. The only exception is if there's sticky residue or spills on hard surfaces that need immediate attention. Deal with those first, then vacuum, then do a full wipe-down. For regular cleaning, the vacuum-then-wipe approach is faster and more effective. It's also easier to see what needs wiping once the loose dirt is gone, which saves time and product.
Why is car carpet so hard to vacuum?
Car carpets are usually dense, short-pile materials designed to withstand foot traffic, which makes them harder to vacuum than household carpets. Dirt gets pressed deep into the fibres and padding, especially in high-traffic areas like the driver's footwell. Standard vacuum nozzles often glide over the surface without pulling embedded dirt out. From our experience, this is why people vacuum repeatedly and still see dirt when they use an extractor later. The shape and angles inside cars make it awkward to manoeuvre larger vacuums effectively. You're working around pedals, seat rails, and tight footwells, which limits how much pressure you can apply and the angles you can reach. A vacuum with a good crevice tool and upholstery brush helps, but the real solution for deeply embedded dirt is extraction, not more aggressive vacuuming. If the carpet looks clean after vacuuming but still feels gritty, the contamination is below the surface.
Related Insights and Articles
Browse by Category
Find the best UK detailing products across our range of categories.


