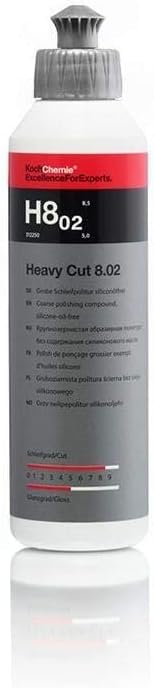
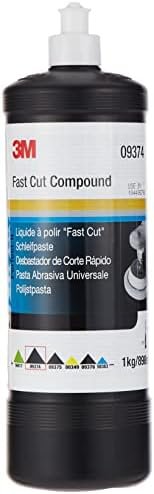
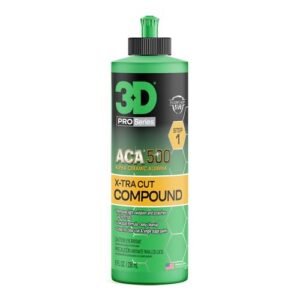
Best Compounds for Paint Correction and Defect Removal

41 products ready to shop 41 products Last checked Checked:

Top Compounds Picks from the TCC Team

Product Our Rating Key Specs
Heavy Cut
4.7

A coarse, silicone-free compound with even abrasive grain that removes deep scratches and up to 1,200-grit sanding marks on soft and scratch-resistant paints alike.

  • Cuts to 1,200 grit
  • Silicone- and oil-free
  • Extended buffing window
  • Rotary and DA safe
Check Latest Price
Complete Compound
4.6

A micro-abrasive compound with diminishing abrasives that opens strong on defects then finishes smoothly, leaving a wax-ready surface without fillers.

  • No fillers or wax
  • Diminishing abrasives
  • Hand or machine use
  • Clear coat and solid colours
Check Latest Price
ACA 500 X-Tra Cut
4.6

A water-based Alpha Ceramic Alumina compound that levels fast with low heat on stubborn clear coats and keeps airborne dust to a minimum.

  • Alpha Ceramic Alumina
  • Body-shop-friendly formula
  • Low heat under load
  • Wool or foam pads
Check Latest Price
DA Microfibre Correction Compound
4.4

A super-micro abrasive compound tuned for DA machines and microfibre cutting discs, clearing light to moderate defects with little sling or dust.

  • Super-micro abrasive system
  • Low sling, low dust
  • DA and microfibre pairing
  • Gentler than rotary-only cuts
Check Latest Price
UltraCut
4.7

An extreme-cut compound built on fully diminishing abrasives that removes heavy defects with very low haze on both rotary and DA setups.

  • Fully diminishing abrasives
  • From P1200 sanding upward
  • Extremely low dust
  • Rotary and DA capable
Check Latest Price
#1 Best overall
Heavy Cut (Koch Chemie)
Heavy Cut
4.7
  • Cuts to 1,200 grit
  • Silicone- and oil-free
  • Extended buffing window
  • Rotary and DA safe
#2 Top pick
Complete Compound (Griot's Garage)
Complete Compound
4.6
  • No fillers or wax
  • Diminishing abrasives
  • Hand or machine use
  • Clear coat and solid colours
#3 Best value
ACA 500 X-Tra Cut (3D Car Care)
ACA 500 X-Tra Cut
4.6
  • Alpha Ceramic Alumina
  • Body-shop-friendly formula
  • Low heat under load
  • Wool or foam pads
#4 Daily driver
DA Microfibre Correction Compound (Meguiar's)
DA Microfibre Correction Compound
4.4
  • Super-micro abrasive system
  • Low sling, low dust
  • DA and microfibre pairing
  • Gentler than rotary-only cuts
#5 Premium pick
UltraCut (CarPro)
UltraCut
4.7
  • Fully diminishing abrasives
  • From P1200 sanding upward
  • Extremely low dust
  • Rotary and DA capable
Compound

Where Real Correction Happens.

Car compounds are designed to remove deeper paint defects by cutting into the clear coat. Swirl marks, scratches, sanding marks, and oxidation sit below the surface. Compounds use stronger abrasives than polishes to level those defects, restoring a flat, even finish. If polishing refines, compounding does the heavy lifting.

4 compound types
Step 1 of correction
Never the final finish
Always follow with polish

Compounding Is the First Stage. Polishing Is the Finish.

Compounds remove. Polishes refine. Both are needed for a proper correction result.

Stronger abrasives for deeper defects

Compounds use more aggressive abrasives than polishes to reach defects that sit below the surface of the clear coat. Swirl marks, sanding marks, scratches, and heavy oxidation all require this level of cut before any refining can take place.

Correction, not just refinement

A polish improves clarity and gloss on paint that is already in reasonable shape. A compound is what you reach for when polish alone cannot remove the defects. This is the step that levels the surface before any refinement can begin.

Never the final step

Compounds leave behind a level of haze or micro-marring that needs refining. Think of compounding as clearing the damage, not completing the job. A finishing polish after compounding is what creates the actual gloss and clarity you are working towards.

Car Compound Is (and Isn't)

Compounds are the most aggressive correction tool. Understanding their limits prevents poor results.

✓ What it is

  • A heavy-abrasive product designed to remove deeper scratches, swirl marks, sanding marks, and oxidation from clear coat
  • The first stage of a proper correction process, levelling the surface so polishing can refine it
  • A product that comes in multiple aggression levels to match the severity of the damage you are dealing with
  • The right tool when polish alone cannot shift the defects after proper technique and passes

✗ What it isn't

  • A finishing product, compounds leave haze and micro-marring that always needs refining with a polish afterwards
  • A protective product, the surface is completely bare after compounding and needs polish and protection before it is done
  • A solution for damage that has cut through the clear coat into base coat or primer, that requires respray not correction
  • A substitute for good technique, the right pad choice affects cut level just as much as the compound itself

Four Compound Types at Different Aggression Levels

Match the cut level to the defect severity. Start less aggressive than you think you need to.

Maximum cutting power

Heavy Cut Compound

Maximum cutting power for deep defects, sanding marks, and heavily damaged paint. The most aggressive option, always followed by polishing.

Highest aggression
  • Reaches the deepest defects that no other product can touch, including wet-sanding marks and severe oxidation
  • Removes the most clear coat per pass, so using it only when truly needed is important
  • Requires a finishing polish afterwards without exception, the haze left behind is significant
  • Machine polisher strongly recommended, hand application is very unlikely to generate enough heat and friction
Use only for severe damage. Always follow with a medium or finishing polish to restore clarity.

Best starting point

Medium Cut Compound

A balance between correction and finish. Removes moderate defects with less haze than a heavy cut. Often the right first step on average paint in average condition.

Recommended start
  • Handles moderate swirl marks, light scratches, and mild oxidation that a polish alone cannot remove
  • Leaves less haze than a heavy cut, making the finishing polish step quicker and easier
  • The best first step for most enthusiasts before committing to a heavy cut compound
  • Works well by machine and is more forgiving than heavy cut options for those newer to correction work
The best first compound for most paint conditions. Step up to heavy cut only if results fall short.

Versatile option

Diminishing Abrasive Compound

Starts aggressive and breaks down into finer abrasives as you work. Can cut and partially refine in one process depending on technique and pad choice.

Technique dependent
  • The abrasive particles break down progressively during use, reducing cut level as they get smaller
  • With the right technique and pad, can reduce the amount of separate finishing work needed
  • Results depend heavily on pressure, speed, and pad type, so consistency is important
  • Popular with professional detailers who can control the process to achieve both cut and finish in fewer stages
Most effective when technique is consistent. A finishing polish is still recommended for best clarity.

Predictable and consistent

Non-Diminishing Compound

Maintains a consistent cut level throughout the entire working time. More predictable, but almost always requires a separate polishing stage afterwards.

Consistent cut
  • The abrasive level stays constant from start to finish, making results easier to predict and replicate
  • Preferred by those who want reliable, uniform correction across multiple panels
  • Does not self-refine, so a finishing polish is required to remove the haze it leaves
  • Good choice for systematic work where correction and finishing stages are kept deliberately separate
Consistent and predictable. Always plan for a dedicated finishing polish after using this type.

Compound, Polish, Protect. In That Order.

Skipping the polishing stage is why most people end up with a dull finish after correction.

This is where most people get it wrong. Compounds remove heavier defects but leave the surface corrected rather than finished. Polishing removes the haze and restores clarity. Protection locks in the result. Skipping step two is the most common reason for a dull or hazy finish after what should have been a full correction.

Step 1 · When needed

Compound

Remove the defects

Uses heavy abrasives to level deeper defects in the clear coat. Removes the damage but leaves a haze behind. Corrected but not finished. This is not the final step.

Correct aggressively
Step 2 · Always

Polish

Refine the finish

A finishing polish removes the haze and micro-marring left by the compound. This is the step that creates the actual gloss and clarity. Never skip this after compounding.

Refine and restore
Step 3 · Essential

Protect

Lock in the result

After polishing, the surface is completely bare. Wax, sealant, or ceramic coating must go on immediately. Without protection, the corrected finish begins deteriorating almost at once.

Wax, sealant, or coating
In practice: Not every correction job needs a compound. If paint has only light swirl marks, a medium or one-step polish may be enough. Compound when polish alone cannot shift the defects, not as a default first step.

Matching the Compound to the Damage

Five scenarios, five clear directions. Start lighter than you think you need to.

Heavy defects, scratches, or sanding marks

Go for a heavy cut compound. This level of damage cannot be removed by anything lighter. Apply by machine, work methodically, and plan to follow with a medium or finishing polish to bring back full clarity.

Moderate defects on average paint

A medium cut compound is usually enough and the better starting point. It removes moderate swirl marks and oxidation with less residual haze, making the finishing stage faster and easier. Start here before reaching for a heavy cut.

You want easier finishing afterwards

Choose a diminishing abrasive compound. As it breaks down during use, the cut level reduces, leaving less haze to deal with. With consistent technique, it can reduce the work needed in the finishing stage without sacrificing correction.

You prefer consistency and control

Go with a non-diminishing compound. The cut level stays constant throughout, making results easier to predict across multiple panels. Plan for a dedicated finishing polish stage after, as non-diminishing types do not self-refine.

You are unsure where to start

Always start less aggressive than you think you need to. Test a small inconspicuous area with a medium cut before committing to the whole panel. You can step up aggression if the results fall short, but you cannot put clear coat back once it has been removed.

What Goes Wrong Most Often

Four mistakes that damage paint, reduce results, or leave you with more work than you started with.

Going too aggressive too quickly

Starting with a heavy cut compound when a medium cut would have done the job removes more clear coat than necessary. There is a finite amount of clear coat to work with. Always test with a less aggressive product first and only step up if the results genuinely require it.

Not following with a polish

This is the most common reason for a dull or hazy finish after correction. Compounds leave micro-marring that needs refining. Stopping after compounding means the surface looks corrected but not finished. A finishing polish is not optional, it is what creates the actual gloss.

Using the wrong pad combination

The pad you use affects the cut level just as much as the compound itself. A heavy cut foam pad with a medium compound produces a very different result than a finishing pad with the same product. Matching compound aggression to pad type is as important as choosing the right product.

Overworking or underworking the product

Working a compound until it dries out reduces its effectiveness. Stopping too early before it has broken down properly produces uneven results. Follow the product instructions for passes and pressure, and work one panel at a time to maintain consistency.

Four Steps That Complete the Job

Compounding is only step one. These four steps finish what it started.

01

Inspect under proper lighting

Check the panel under a strong single light source before moving to the next stage. Haze, missed areas, and remaining defects are easiest to spot now. It is far easier to go back over a section before polishing than after protection has been applied.

02

Follow with a finishing polish

This is not optional. The haze left by compounding needs a finishing polish to restore full clarity and gloss. Use a light finishing polish by machine or by hand, working the same areas you have just compounded. This is the step that creates the actual shine.

03

Remove any residue or oils

Both compounds and polishes leave residue and oils on the surface. Wipe down with a clean microfibre panel wipe before applying any protection. This matters most for ceramic coatings, which need a completely clean, bare surface to bond correctly.

04

Apply protection immediately

After polishing, the surface is completely exposed with no protection at all. Wax, sealant, or ceramic coating must be applied before the car gets wet or is exposed to contamination. Leaving corrected paint unprotected undoes the work almost immediately.

Compounding is where real correction happens. Used at the right aggression level, on the right defects, with the right pad, and followed by a proper finishing polish, it transforms damaged paint into a surface ready for protection. Skip any part of that sequence and the results will show it.

Browse All Compounds

Click through to check today's price and availability from trusted retailers.

Scotch 09374 Fast Cut Compound

Scotch 09374 Fast Cut Compound

4.8/5
Check latest price
CarPro Fixer Polishing Compound 250ml

CarPro Fixer Polishing Compound 250ml

4.8/5
Check latest price

FAQs

No. Compounds are only needed for heavier defects. If the paint has light swirls or is in good condition, you can go straight to polishing.

You can, but it’s limited. Compounds are designed to work with machine polishers. By hand, you’ll struggle to remove anything beyond very light defects.

Only if the scratches are within the clear coat. Deeper scratches that go through the clear coat won’t be fully removed, only reduced.

Yes, if done properly. But it removes a small amount of clear coat, so it should be used carefully and only when needed, not as a regular step.

Browse by Category

Find the best UK detailing products across our range of categories.

Our methodology

Your independent guide to the best car detailing products in the UK.

Step 01 · Sourcing

We start with every option

Hundreds of car cleaning products, pulled from trusted UK retailers across every category - shampoos, sealants, interior, glass, tools and more.

Step 02 · Scoring

Ranked by real-world signals

Customer ratings, review volume, price-to-performance and editor testing notes feed the score. No brand payments, ever.

Step 03 · Freshness

We keep it fresh and clean

Total Car Clean is 100% reader-supported. We may earn a small commission from affiliate links, but we remain unbiased to help you find the best products.

Independent No paid rankings UK-focused